How to Paint Wood Paneling Like a Pro – Step-by-Step Guide
Painting wood paneling is a simple yet effective way to give dated interiors a fresh and updated appearance. Instead of removing existing paneling, many homeowners choose to paint wood paneling to modernize a room while keeping renovation costs manageable. With the right preparation and technique, painted paneling can brighten walls and create a stylish look. This guide explains the essential steps to help you achieve smooth, long-lasting results when updating wood-paneled walls.
Preparation is Key
Before you paint wood paneling, thorough preparation is essential to achieve a smooth and durable finish. Taking time to clean, repair, and prepare the surface allows the paint to bond properly and prevents issues later. Proper preparation also improves the final appearance, helping the updated wood paneling look neat, modern, and professionally finished.
1. Clean the Paneling
Cleaning the surface is the first and most important step before you paint wood paneling. Over time, paneling gathers dust, grease, and residue that can stop paint from sticking well. Using a strong degreasing cleaner or a similar solution helps remove buildup so the surface becomes clean and ready for primer and paint.
2. Assess the Surface
Carefully checking the paneling helps identify small issues that could affect the final result. Cracks, dents, or nail holes should be filled with wood filler so the surface becomes smooth and even. Once the filler dries, sanding the repaired spots ensures the painted wood paneling will look consistent and seamless.
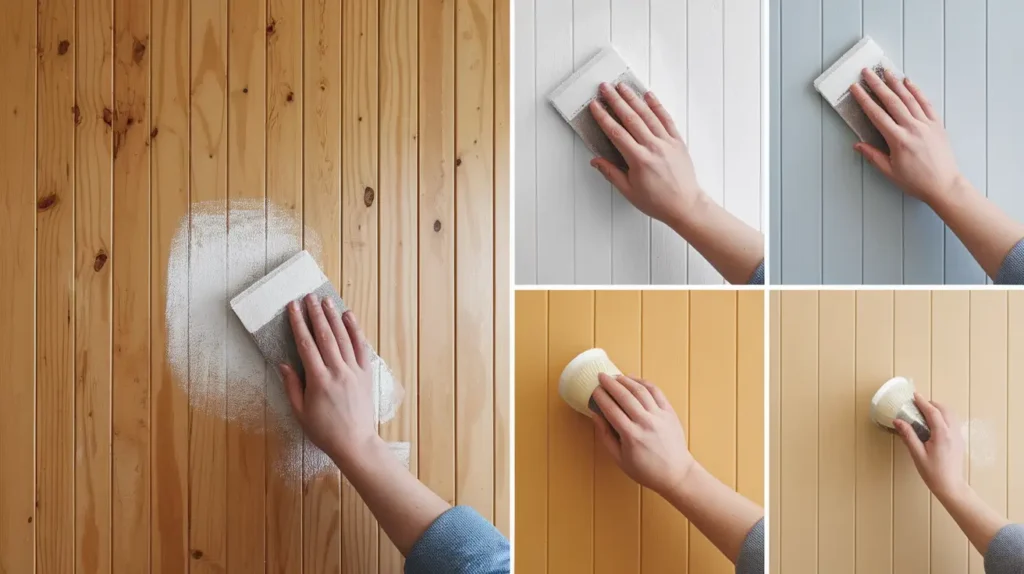
3. Sand (When Necessary)
Sanding is not always required, but it can make a big difference when you paint wood paneling with a glossy or sealed finish. Light sanding slightly roughens the surface, allowing primer to grip better and improving paint adhesion. If older paint might contain lead, skip sanding and apply primer carefully to keep the process safe.
4. Fill Gaps with Caulk
Applying paintable caulk between panel seams, trim, and molding creates a more refined appearance when you paint wood paneling. Filling these small gaps helps hide uneven edges and prevents shadows between planks. Once smoothed and dried properly, the paneling will appear more solid and polished after painting.
Prime for Success
Using primer is a critical step when you paint wood paneling because it improves coverage and blocks stains from showing through the paint. Primer also helps the new paint layer adhere strongly to the wood surface. Skipping this step often results in uneven color or visible wood tones underneath the paint.
Choose the Right Primer
Selecting the correct primer depends on the material and condition of your paneling. Oil-based primers are useful for natural wood surfaces with knots or stains, while water-based stain-blocking primers work well for laminate or faux paneling. Choosing the proper primer helps the paint grip the surface and ensures long-lasting results.
Application Tips
Applying primer correctly improves the overall finish when you paint wood paneling. Using a roller on large flat sections speeds up coverage, while a brush works better for grooves, corners, and panel lines. A thin, even layer is usually enough, though a second coat may be helpful if repairs or sanding were required.
Start Painting
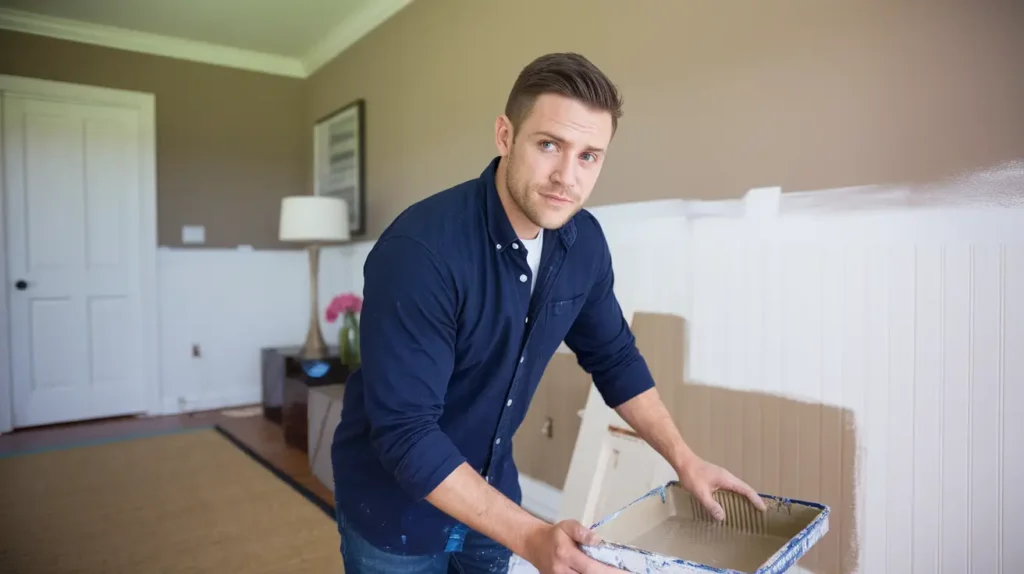
Once the paneling is fully primed and dry, the painting stage begins. This step allows you to completely refresh the look of wood-paneled walls with modern color and style. Careful painting techniques help create a smooth surface while highlighting the texture and structure of the paneling.
Selecting the Best Paint
Choosing the right paint makes a noticeable difference when you paint wood paneling. Interior latex paint with a satin finish is commonly recommended because it provides a soft sheen and easy maintenance. Other finishes like eggshell or semi-gloss can also work depending on the room style and lighting.
1. Start at the Top
Beginning at the ceiling line and working downward helps maintain a clean painting process. This method prevents paint drips from falling onto already finished sections. When you paint wood paneling from top to bottom, it becomes easier to control the paint and keep edges neat.
2. Thin, Even Coats
Applying thin coats helps achieve a smoother finish and prevents heavy streaks or uneven patches. Even layers dry more quickly and improve how well the paint bonds with the paneling. Using a roller for wide areas and a brush for grooves ensures every section of the paneling is covered evenly.
3. Allow Proper Drying Time
Allowing each coat to dry completely is important for durability and appearance. If the paint layers are rushed, the surface may peel or develop uneven textures. Giving the paint enough time to cure ensures the newly painted wood paneling remains smooth and long-lasting.
4. Apply a Second Coat
A second coat of paint strengthens coverage and improves the depth of color. Even if the first layer looks acceptable, another coat ensures a more consistent and professional finish. When you paint wood paneling carefully with multiple coats, the final result appears richer and more durable.
5. Trim and Moldings
Paneling often includes trim pieces or decorative molding that require careful painting. Using a smaller angled brush allows you to reach detailed areas and maintain clean edges. Painting trim in a contrasting color or slightly different sheen can add visual interest and highlight the structure of the paneling.
Bottom Lines
Choosing to paint wood paneling is a practical way to modernize a room without major renovation work. Fresh paint can brighten dark walls and give older interiors a cleaner, more contemporary atmosphere. With the right preparation and techniques, painted paneling can look stylish and updated.
Following these steps allows homeowners to improve their space while keeping the project affordable and manageable. The process requires patience and attention to detail, but the results can dramatically improve the room’s appearance. A well-finished paneling update reflects both care and personal design style.
Instead of living with outdated walls, painting offers a simple solution to transform them. With proper tools, good preparation, and the right paint color, anyone can refresh their interior. A thoughtful approach to painting wood paneling can turn a once dated feature into a modern design element.
Many of the ideas I share are inspired by real-life experimentation. I often test décor concepts in my own living spaces and explore practical ways they can be applied in everyday homes. I also gather insights from working with homeowners who want to improve the comfort, beauty, and functionality of their spaces.
I share practical ideas for improving living rooms, bedrooms, and overall home aesthetics using simple design principles.
I explore creative ways to upgrade outdoor spaces including patio décor, small backyard styling, and relaxing outdoor setups.
I provide ideas for kitchen organization, décor accents, and functional layouts that make kitchens more beautiful and practical.
The concepts shared here are based on ideas I have personally experimented with or studied through real home décor improvements.